
Adobe InDesign is a fantastic piece of software, and one that we frequently use in the studio for layout of publications and documents. It’s a fairly intuitive programme, and there is absolutely masses of things you can do with it. However, for those starting out, it may seem a little overwhelming. Our designers have chosen their top 3 tips they wish they knew from the outset when learning InDesign:
1. Master pages are your best friend
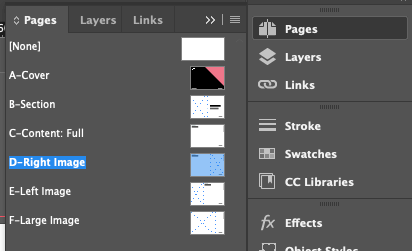
Using master pages will allow you to create a consistent document and save you masses of time. They allow you to automatically insert layout formats into your document and are ideal for repeated elements. You can include different margins and grids, as well as multiple layers, headers, footers and column guides. As a standard, they are locked in place, meaning you don’t have to worry about things moving or being deleted.
Take away tip for master pages:
Make sure you include your page number marker on the top most layer – and lock it – of your master page. This will ensure you’ll never delete, hide or miss a page number off!
You can watch a tutorial on master pages here.
2. Setting up Styles will save you time
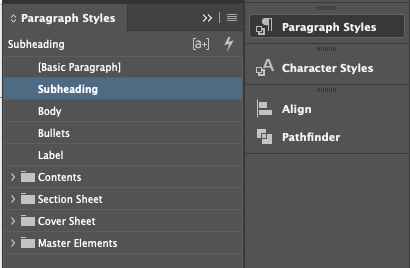
‘Styles’ are a series of formatting attributes you can apply to text and objects. It may seem like a bit of a faff to begin with, but if you commit from the very start, to set up your paragraph, character and object styles, it will save you valuable time in the long run.
Imagine completing a 50-page document, only for the client to request that all your body copy is increased by 2pts or the call out bubbles to be blue instead of green. Rather than going through and updating all examples manually, you can simply update your paragraph or object style and hey presto, it will change it throughout the entire document.
In case you didn’t know:
You should use character styles when you want to change individual characters or words within your paragraph styling.
Take away tip for styling:
Make sure you rename your styles, so they are logical and easy to find.
You can watch a tutorial on styling here.
3. Save and load swatch palettes
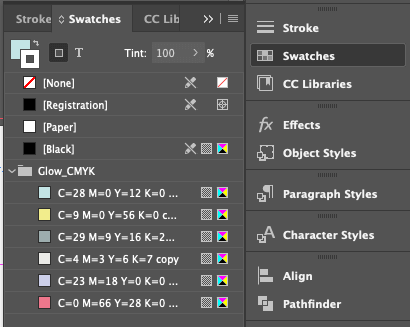
If you’re working with a particular brand, rather than adding in the relevant colour values every time you start a new document, you can save a group of swatches and load them every time a new project begins.
Take away tip for swatches:
Save a CMYK and RGB version of a swatch palette for each client in a brand folder so it is easy to locate and load depending on whether you’re creating a document for print or digital.
Take it to the next level:
CC libraries are a fantastic way to collate all your brand assets such as icons, styles, images, brushes, and colour themes. It means you can move between devices and documents with a shared library, so it is all easily accessible. CC libraries work across the majority of the Adobe Suite programmes.
Learn what you can do with CC libraries here.
This is just the tip of the iceberg, there are so many amazing tools and tricks to be utilised in InDesign. Make sure to learn keyboard shortcuts for common tasks you do frequently to improve efficiency. And, always check out the ‘What’s New’ page every time there is an InDesign update so see what features have been added.