When learning a new programme, it is exciting to discover the extensive capabilities at your fingertips, however, when there is so much to take in, it can also be a little overwhelming at times. We wanted to share a few useful tips and tricks for when you are beginning your journey with Adobe Illustrator.
How to align and evenly distribute objects
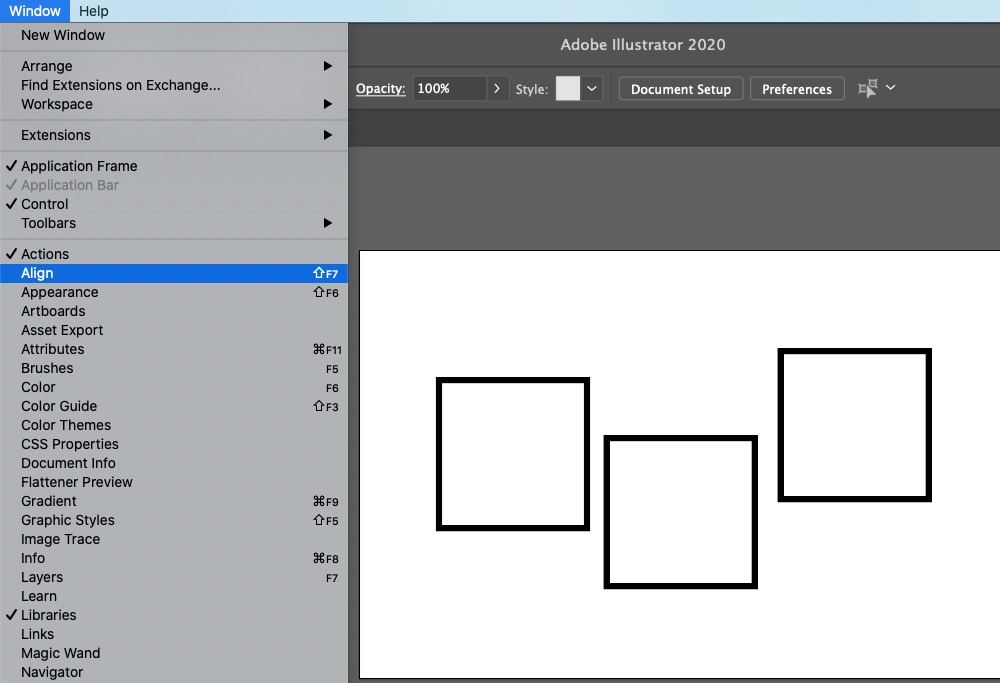
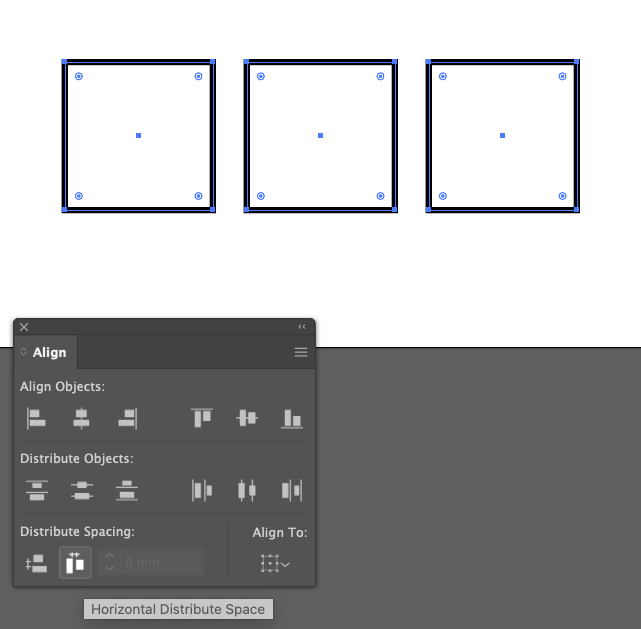
Firstly, go to ‘Window’ and select ‘Align’ from the drop-down menu to make sure the panel is visible.
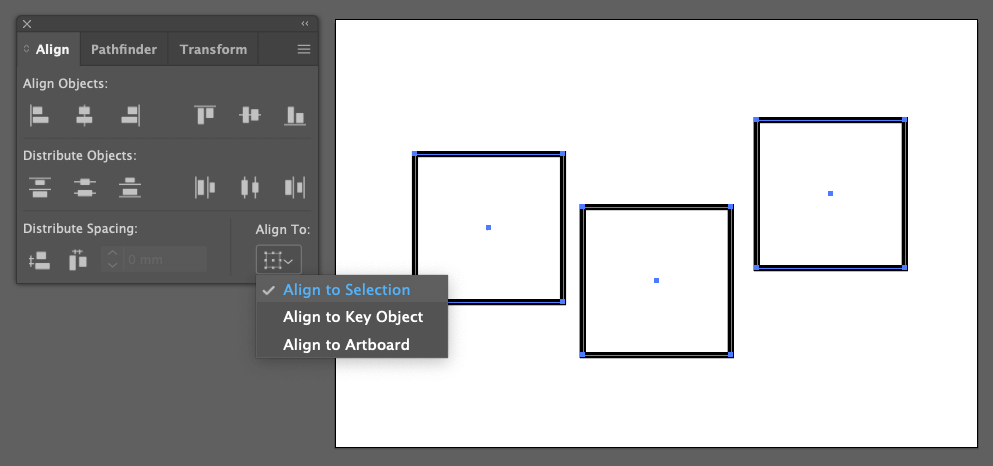
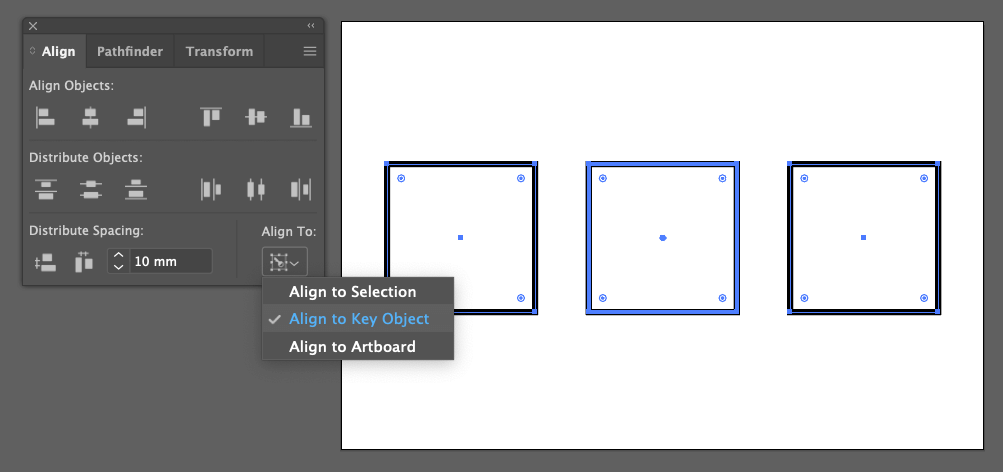
You can choose what you’d like to align your objects to; your selected items, a key object or the artboard. In this instance, we’re aligning to the selection (these are highlighted by the blue path outline).
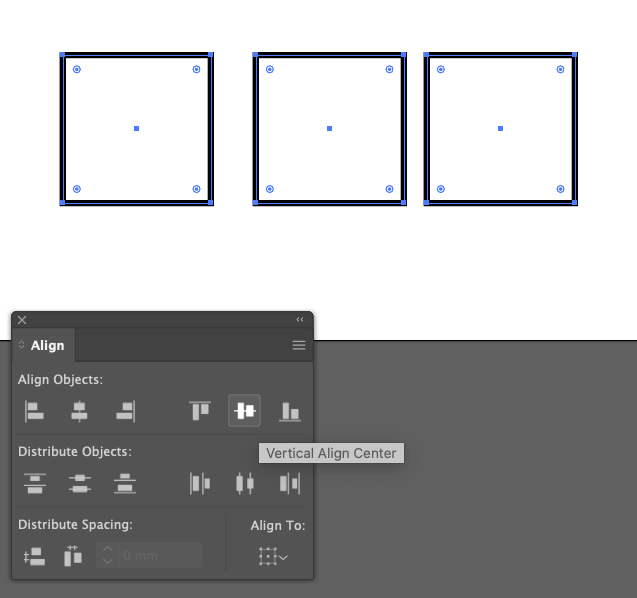
Select ‘Vertical Align Centre’ (or ‘Horizontal Align Centre’ if want to stack the objects).
To distribute the objects evenly, use the distribute spacing option.
If you require an exact spacing measurement between your objects, select ‘Align to Key Object’ in the drop-down menu. Enter the size before clicking the distribute spacing button (vertical or horizontal depending on the orientation you want).
Useful tip:
- Align to Selection– allows you to align selected objects based on the bounding box all selected objects sit within.
- Align to Key Object– allows you to align selected objects in regard to the positioning of a chosen object. You can also enter an exact spacing with this option.
- Align to Artboard– allows you to align selected objects based on their correlation to your artboard. If you want multiple objects to move within an area as one entity, group them first (Cmd + G).
How to use the Illustrator shape builder tool
In this instance, we’ll show you how to create a simple cloud shape. The same rules will apply to any custom shape you would like to build. As you practice using this tool, you’ll discover it will make creating more complex vector graphics and logos significantly easier.
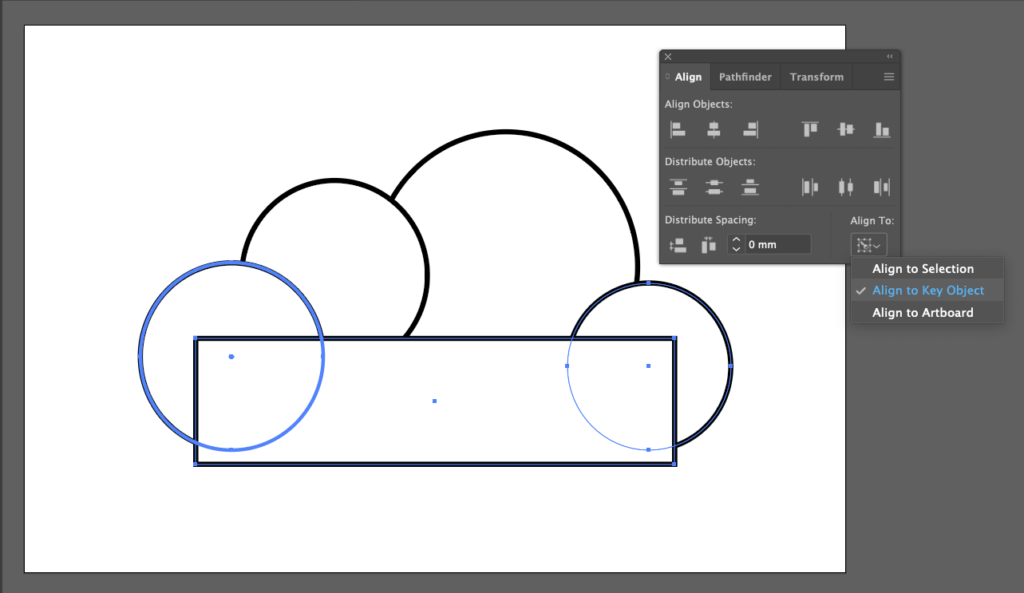
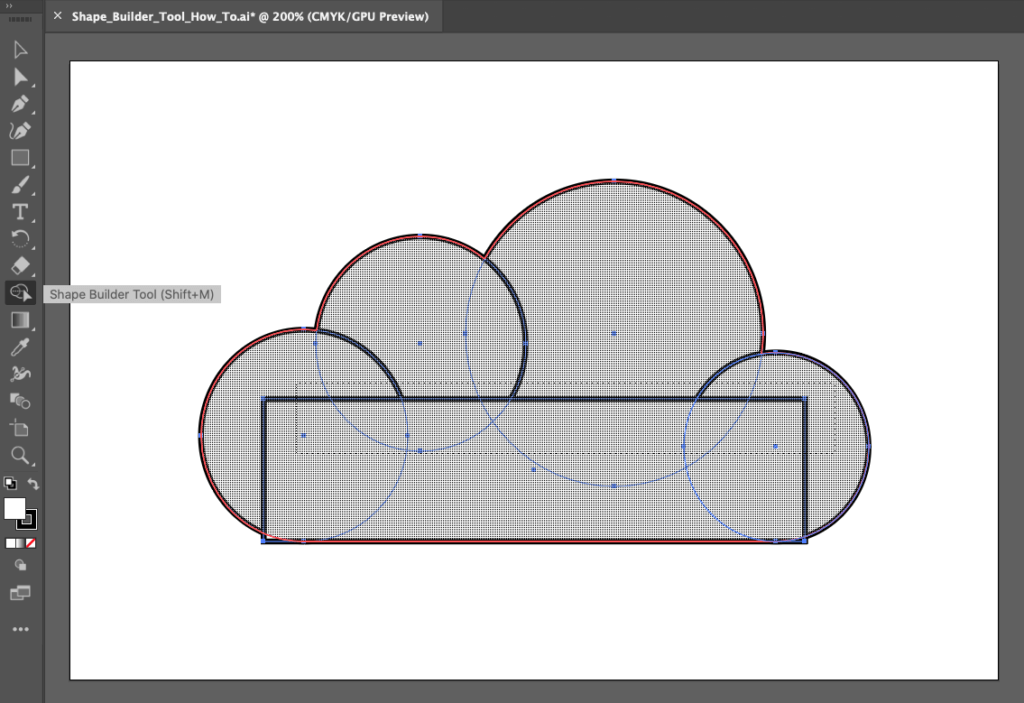
Create the initial base of your shape by drawing out several overlapping elements.
In this instance, we want to create a flat base for our cloud. To do this open the Align panel (Window > Align) and select the objects you want to align. Choose ‘Align to Key Object’ in the drop-down menu and click on the object you want to align to. (This will show in a thick blue outline).
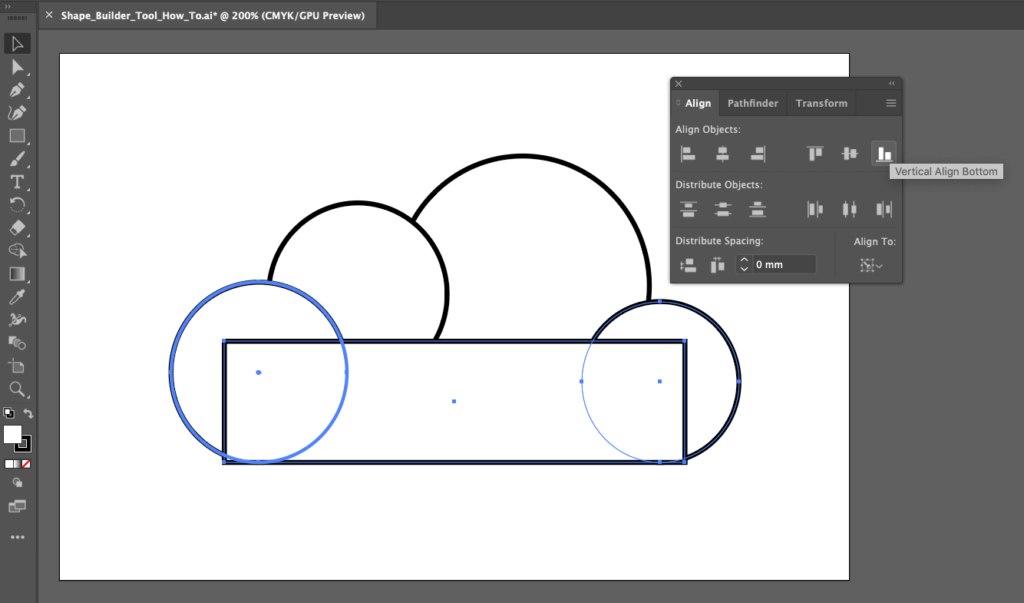
Then choose ‘Vertical Align Bottom’.
Select all your shapes and choose the ‘Shape Builder Tool’ (keyboard shortcut: Shift + M). Drag your cursor through all the segments you would like to include.
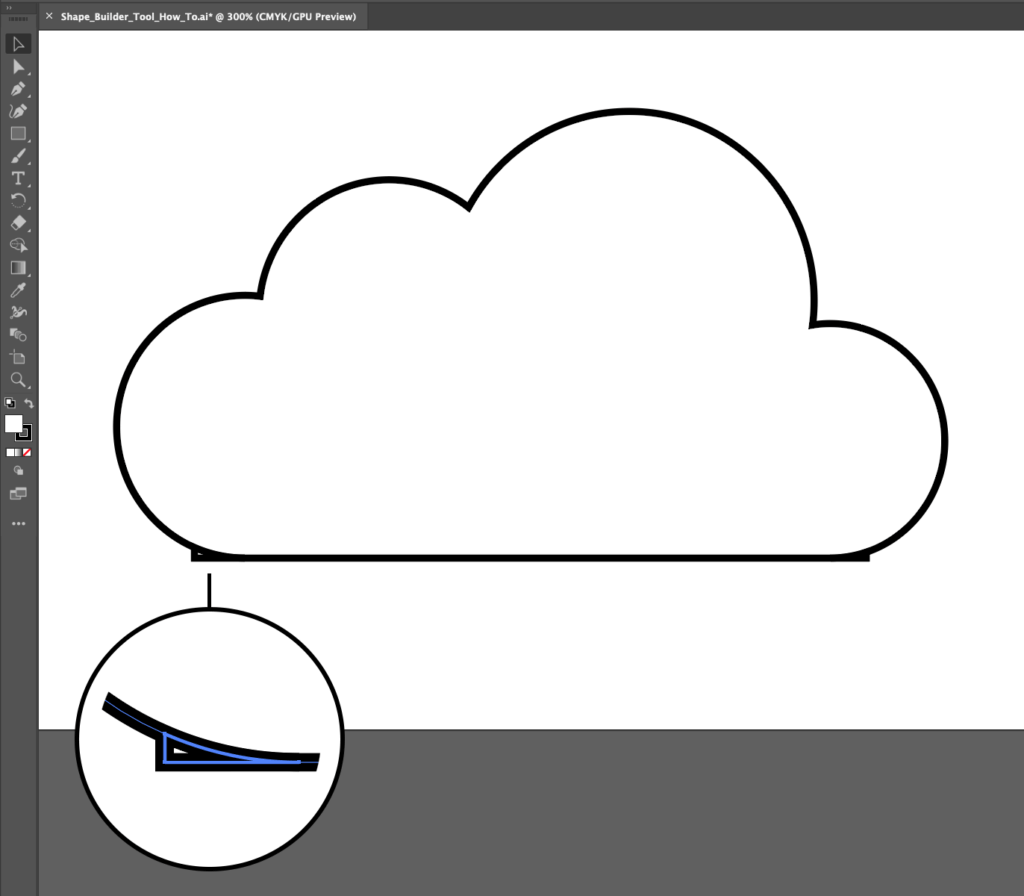
You may be left with some unwanted parts on your shape. Holding down ‘ALT’ whilst on the shape builder tool will allow you to delete segments.
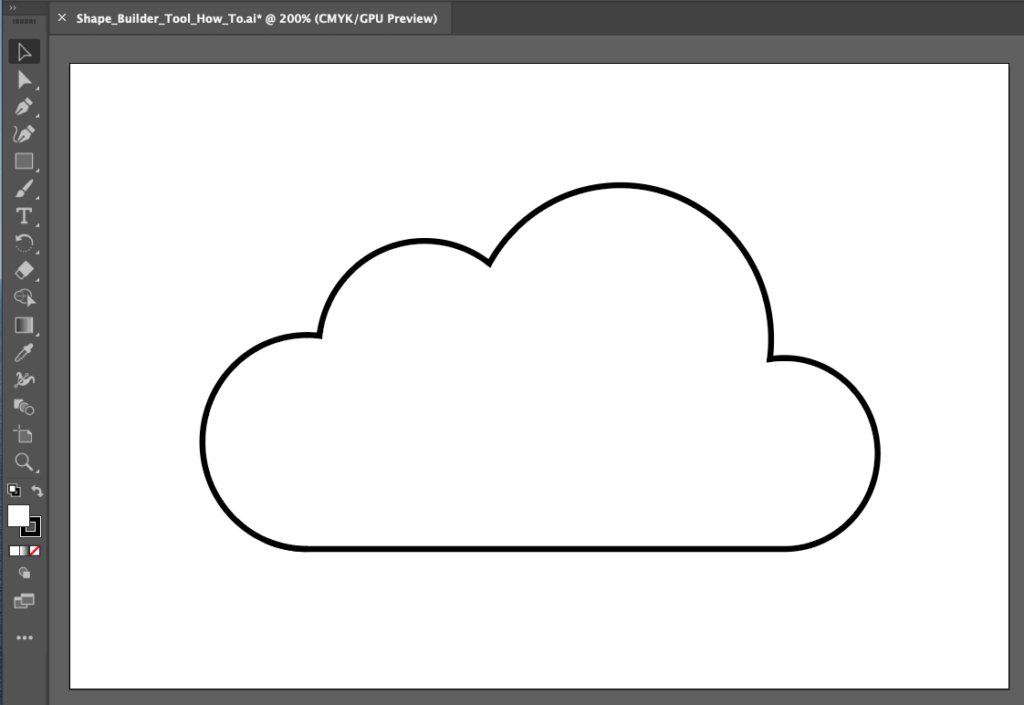
Here is the finished result – a curvy, yet smooth cloud.
How to use clipping masks on Illustrator
Clipping masks are great for cropping an entire piece of artwork to specific dimensions or inserting patterns, textures or images into a set shape (whilst remaining editable in its original format).
In this example, we’ll show you how to clip a pattern background into a curvy shape. These steps will work for any instance though, for example a photograph within an oval.
It is important to note that only single objects can be placed inside a clipping mask. This means multiple objects must be grouped together or placed in as a singular linked file.
You will first need your pattern, texture or image, as well as the shape you would like to contain the element within.
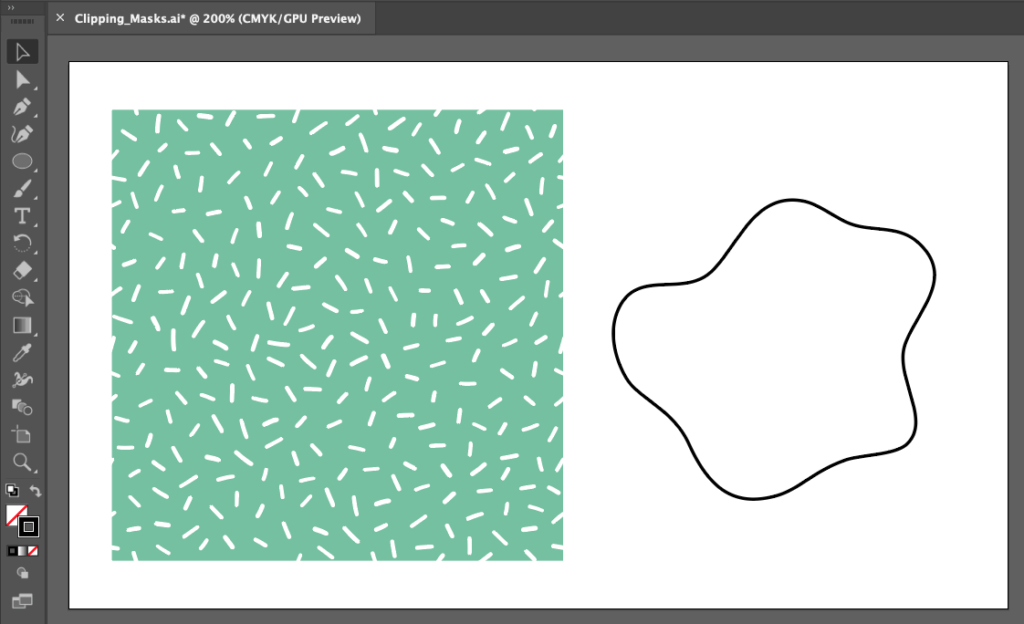
Make sure your content element is larger than your shape, then move your shape to the front.
Useful tip: The stroke or fill of your shape will not show when you create a clipping mask. It is best to use a visible outline to initially see what will be contained within the mask.
Highlight both elements and right click, on the drop-down menu and select ‘Make Clipping Mask’.
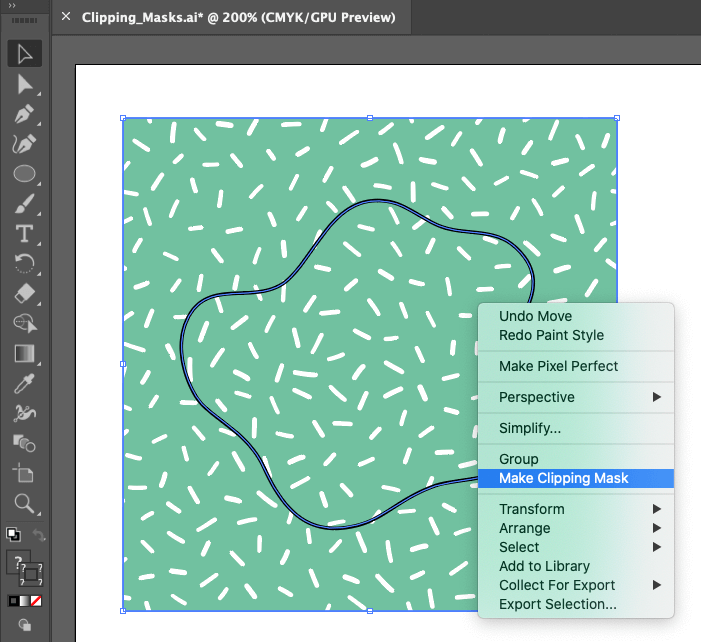
Alternatively, navigate to Object > Clipping Mask > Make.
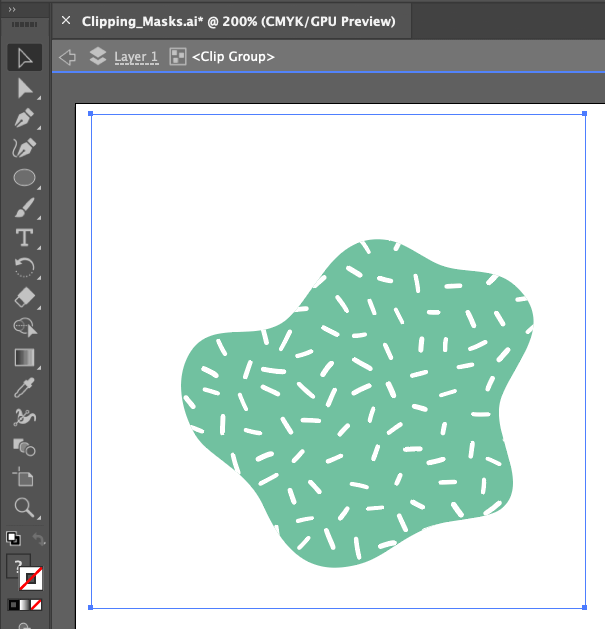
Here is the result.

Double click on the shape to move the pattern inside around, allowing you to get the finished result just as you’d like it. Even the shape itself isn’t permanent, you can edit the individual anchor points if required using your ‘Direct Selection’ tool (shortcut A).
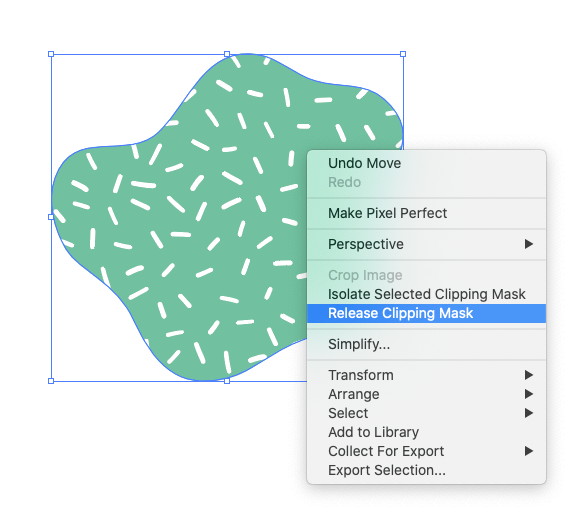
If you want to make the two items separate again, simply right click and choose ‘Release Clipping Mask’, or alternatively go to Object > Clipping Mask > Release.
We hope these few Illustrator tips and tricks have been useful and you enjoy learning and discovering this great programme!
Check out our other Adobe beginner tips for: